Aesthetics is the most basic function of a car’s paint. Like any other personal possession, a car reflects who you are and therefore should portray a good image and personality. However, ignoring a car’s paint; it becomes necessary when it fades or scratches occur.
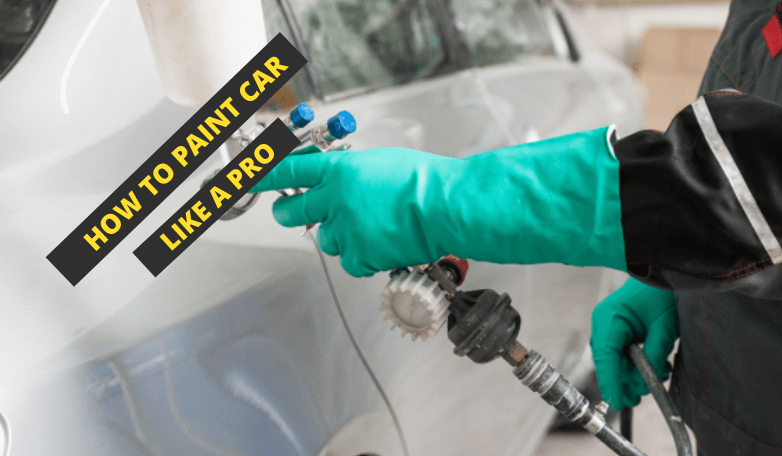
Painting a car requires a certain level of professionalism and experience. High-quality paint alone cannot guarantee you an excellent paint makeover for your car. Combining artistry with craft and technical ability provides a final product that makes a car look straight from the assembly line. For excellent results, the process of painting a car requires a step-by-step touch-up job explained here. Here is how to paint cars like a pro.
1. Dismantling and masking:
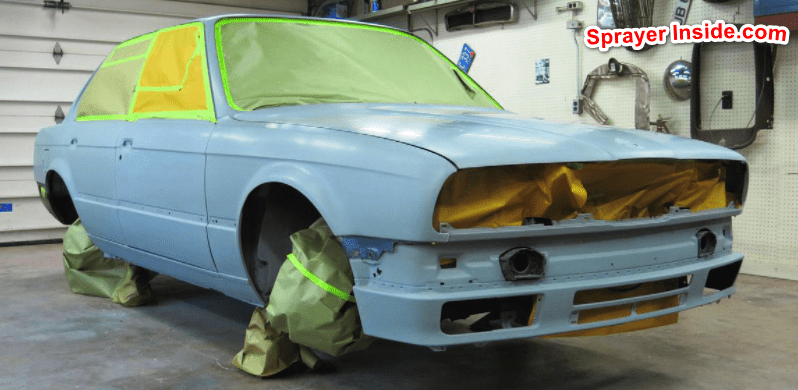
To avoid splashing paint to unnecessary parts and avoid clear coat build-up, parts of the car need to be entirely dismantled from the car’s body. Parts like the bumper, the trunk, door trim panels, glass, the drive train, and sometimes the body may need to be separated from the car’s frame. For some parts of the car, the windscreen, for example, can be masked off to avoid stains. However, it is easy to remove paint stains using simple instruments like a razor blade and an ordinary glass cleaner.
To mask off the windscreen, it is advisable not to use newspapers and instead use specific masking papers designed for automotive paints to avoid the paint bleeding through the paper. It is also advisable to remove lights and the license plate to paint beneath it. To remove glass panels, you need to roll down the glass, remove weather stripping, then remove the trim panels, and from there, it is much easier to open the screws that attach the glass to the window regulator.

Remember to remove all the rain shields. On the forefront of the car, begin by removing the windscreen wipers. It is also good to remove the entire windscreen, but if you prefer to work with it intact, you need to mask off the entire glass, including the weather strips. Remove the headlights and the fog lights, remove the grill too, and if there is a brand emblem that also needs to come off. Remove trim if it is in the way for better quality results. Remember to put masking tape on all cables to the headlights and fog lights to avoid staining them with paint.
At the doors, put masking on the handles and knobs. At the rear side of the car, remove the rear windshield wiper. If the subject car has a wheel at the back, that also should come off. Remove the backlights and now open and remove the trunk and the rear bumper. Cover the entire part of the wheel, including the rim. A plastic bag should cover the ground area where the car is entire to avoid staining the floor. Now that everything to be painted has been removed, the car is ready for the next step.
2. Cutting and sanding:
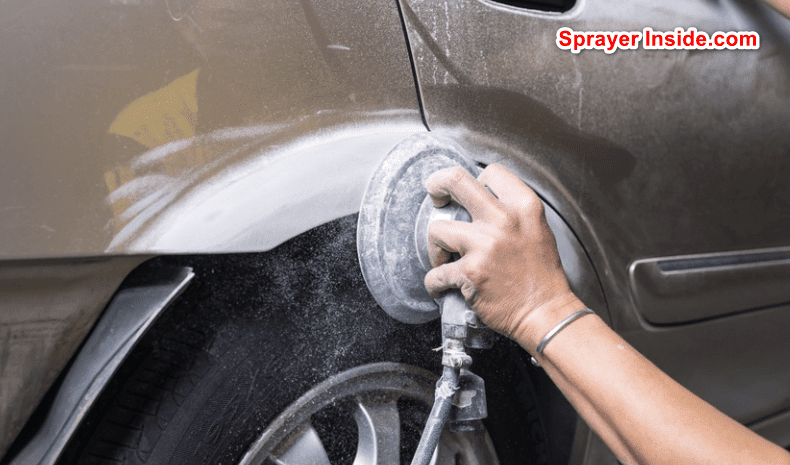
The process which matters the most when painting a car is cutting and sanding, which comes first before applying primer. Cutting and sanding are normally done using an abrasive compound to remove the top and thin layers of paint. This process should leave all the surfaces that need to be painted flat and smooth and ready for paint to be adhesive. The previous run-off clear coat lines are also eradicated here.
To ensure no imperfections, you need to feel with your hand when sanding. Possible rusts on the surface or surface damage are also be removed by cutting. The process of sanding starts by removing old primer and paint. This is done by a Dual- Action Polisher or sander fitted with 80-grit sandpaper. However, it can be done by hand, although it takes much longer than a sander.
This sander oscillates only to clean the paint and does not touch any part of the metalwork. The next thing that gets cleared is anybody’s filler. This is done with 120-grit sandpaper, and the best way to scrub is by making x shaped movement patterns on the surface for a uniform surface. This also helps in feathering out the nasty paint cracks.

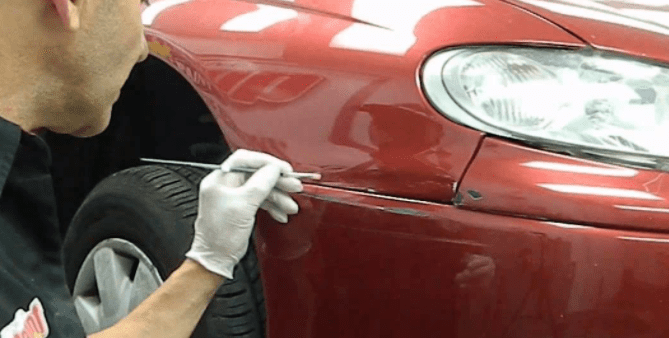
Any scratching made on plastic surfaces like the bumpers at this stage can be applied primer and filled with glazed putty and then performed with water-sand it with 400-grit sandpaper followed by an additional quick coat of primer and sanded again with 120-grit sandpaper. At this stage, any part that needs to be filled with the body filler, especially the rock chips, can be filled with body filler that has been mixed with hardener Talra nation that is nice to the hardeners.
Lastly, use 380-grit sandpaper all over the entire car for the smoothest finish. When doing this, make sure that you do not use a little more pressure and dig deep on the corners and edges of the surface as the sandpaper may expose the underlying layers. You now need to clean and wipe the surface for any grease on fingerprints and dust, or any other debris from the cleaned surface. You can use grease and wax remover or a microfiber towel for the best results.
3. Priming:
This is essential in applying paint on metal surfaces where the primer is spayed before adding any color or topcoat. Primer puts a seal to the surface and creates a protective boundary creating the best surface for a color to stick to. The elastomeric acrylic coating is the best automotive primer for metal surfaces.
It helps to wipe out any imperfections on the surface of the car. In the case of plastic surfaces, be keen to use a specific primer for surfaces. Apply two thin layers of primer 8 to 10 inches from the surface and let each one of them dry; make sure you spray smoothly to avoid run-off clear coat lines. You can now wipe the surfaces with primer with a rag slightly dampened with thinner. Now the car is ready for painting.
4. Painting:
This is where you have to apply paint to a car. It would be best if you considered things like a pro painter before spraying the car’s surface to have the right paint for the car.
Matching paint
It takes a lot of detail to match the car’s original color. Whether you are painting the car a different shade or matching it with the current paint, you need the rightful shade. Car color varies in model and makes, and therefore you should be very keen to match the color you want to paint with the car’s original color.
To get the right paint for your car based on its color, registration year, and manufacturer, there are over 8000 vehicle color matches across the range where you can locate the right color much easily and quickly. You can also proofread the color in bright light.
Color Associations
Colors have different psychological associations and also have an impact on the interior temperature. If you don’t want to overwork your air conditioner, you can prefer colors such as green, blue, grey, and white.
Dirt and Scratches
Some colors can hide minor paint flaws. For example, Black looks excellent when clean, but it can be visible from afar once it is dirty. When scratched, it exposes primarily white undercoats. The brightness in white cars overwhelms the eye, and thus minor defects or dirt are rarely seen.
Resale value
If you consider selling your vehicle shortly, you should consider painting colors that maximize its value. Neutral shades like black, white, silver, and charcoal have a broader buyer segment.
Quality of the paint
most professional paint selling outlets will have an adequately trained painter who advises on the quality of paints in the store. Of course, it varies in price, and the higher the quality of the paint, the more expensive it is. The best painting results are got with the best quality paints.
When it comes to automotive colors, there are four types of colors:
- Acrylic lacquer
- Acrylic urethane
- Acrylic enamel
- Water-based
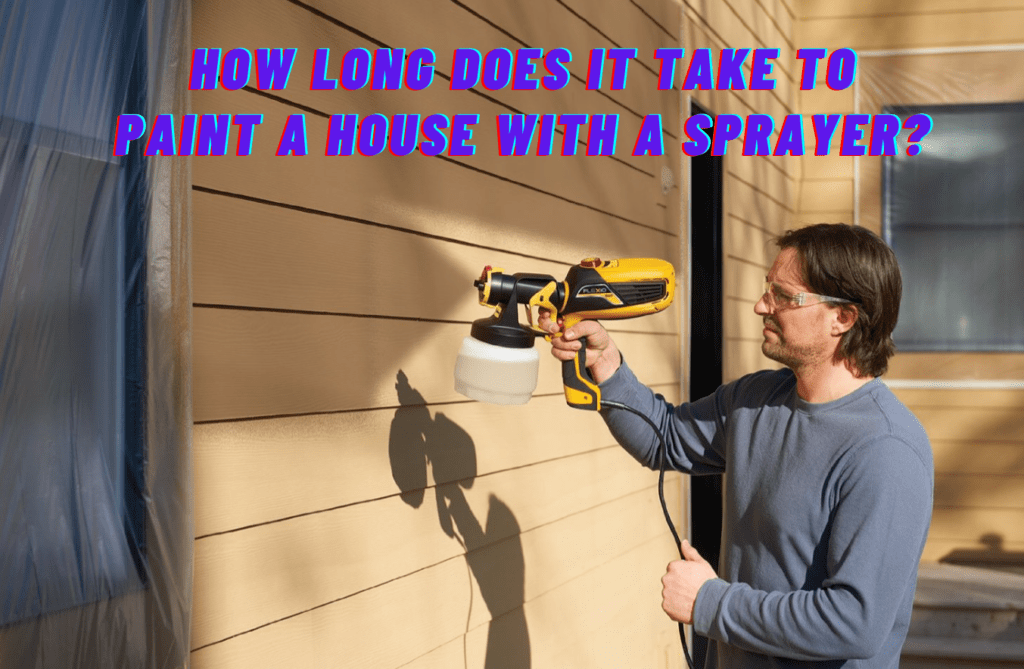
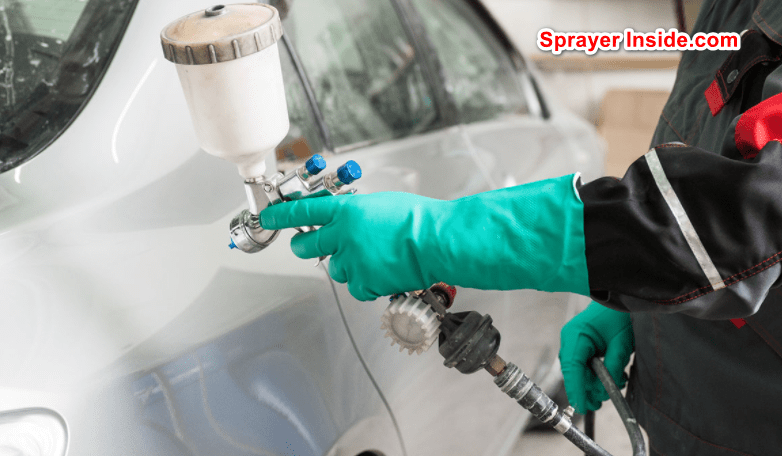
When you have chosen between the four types of color, you can now begin the painting process. You now need the best machines to do the job, and that is where the Wagner Flexio 990 comes in. This spraying device has a direct intake of paint from the tin, making it fast and clean.
Depending on the surface to be painted, this sprayer has an adjustable nozzle and a 7-meter-long nozzle for a more extensive working radius. This sprayer atomizes paint onto the car’s surface, and thus using it for painting cars is the best way to use it. Back to painting, it would be best to make sure all edges are taped to make the exercise precise and avoid splashing onto surfaces that do not require painting. You can use masking tape and old newspapers.
When the car is ready for painting, Use the manufacturer’s instructions in the paint container to prepare the paint for spraying. Now put the paint in Wagner Flexio 990 and make it airtight. Adjust the nozzle to change the width and pattern of the spray Adjust the trigger to start spraying. The nozzle is adjustable such that you can use it for both horizontal and vertical movements. The red button adjusts the width of the spray pattern. The Wagner Flexio 990 is equipped with variable-speed air power control. This control adjusts the level of air pressure produced by the turbine.
It is advisable to hold the spraying nozzle approximately 6 inches away from your car’s surface for better results. When spraying, use a side-to-side motion and apply paint in 3 thin, even layers. Three to four layers of thin paint are needed to cover the surface entirely. The time spray takes to dry up is approximately 30 minutes to one hour, but it may vary with the manufacturer’s speculated time.
Remember to paint the rear and the front bumper that you had earlier dismantled. There might be a Powdery residue on the surface of the vehicle, so before you put the last coat on, wipe off the residue using a dry piece of cloth. Applying the same procedure, apply the last coat and leave it to dry. After it has dried up, now it is time to apply lacquer using the same painting technique. According to the car manufacturer, it’s now time to remove all the masking tapes while the lacquer is still wet to dry up.
5. Bluffing / Polishing:
This is the last stage of painting like a pro. To make your creation appear shiny, you now need to buff the surface in circular motions all over the painted surface. A rubbing compound brings a glossy finish that makes the car look straight from the assembly. After the whole process is complete, it is clear that you have painted a car like a pro. You can now assemble the parts you had earlier dismantled.
Connect back the headlights and the rear lights. Put all the mirrors and window panes back in their positions and put the front and rear wipers back in place. With the laid-out procedure, painting has never been easier, and you have painted a car like a pro.